


Step-by-Step Guide to Creating Mylar Bags
Die cut Mylar bags provide particular shapes or custom home windows that decorate product visibility and shelf enchantment.

Creating Mylar bags might also seem difficult in the beginning; however, when you comprehend the total process, it will become simple and practicable. These bags are extensively used for storing food, supplements, herbs, and other objects that require protection from moisture, mild, and air. Mylar, made from BoPET film, offers superb barrier properties, making it a famous packaging preference. Whether you intend to use them for private initiatives or commercial enterprise purposes, knowing the proper method ensures regular effects. This blog post will walk you through every step, little by little, Die Cut Mylar Bags so that you can confidently produce reliable and amazing designs that fit your packaging requirements.

Know the Mylar Bags' Purpose Before You Begin
First of all, its essential to become aware of why you need to make Mylar. For instance, food frequently wants thicker Mylar bags with delivered foil lining, while others might not require that stage of safety. Moreover, know-how shelf existence expectations help you make a decision whether to include resealable zippers or keep the layout simple.
Die cut Mylar bags provide particular shapes or custom home windows that decorate product visibility and shelf enchantment. They integrate innovative design with durable barrier safety for freshness and safety. Shape your brand using premium Custom Die Cut Mylar Bags designed for freshness, customizable in any style or shape. Claim a free quote, enjoy 15% OFF, along with cost-effective shipping.
SPECIFICATIONS
|
Style |
Doable in any style and shape |
|
Dimension (L + W + H) |
Any Size and Dimension is doable |
|
Quantities |
100 500,000+ |
|
Stock |
Plastic (PET and Clear PET), Brown Kraft, Food gradable, and Aluminum |
|
Printing |
Printing (Digital or Plain), Flexographic Printing, Rotogravure Printing, Cold Foil Printing, PMS & CMYK Colors Scheme, Offset Lithography, and Spot Colors. |
|
Finishing |
Gloss and Matte Lamination, Gloss AQ, Gloss UV, Spot UV, Embossing or Debossing, Foiling (Gold, Silver, Copper, Red, Blue Foil Stamping) |
|
Additional Options |
Resealable Closure, Zipper Lock, Heat Sealable, PVC Window Design, and Round/ Square Corner |
|
Turnaround |
12 14 business days after confirmation of design by our customers. |
|
Shipping |
Pack in Boxes, then ship through UPS, DHL, and FedEx. |
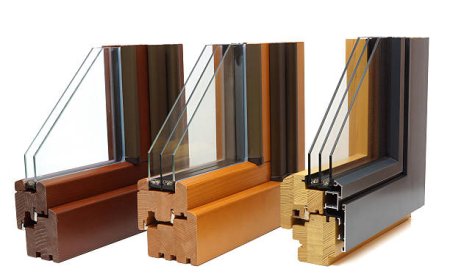
The Correct Mylar Film Material
Next, focus on selecting the proper film fabric. Mylar is available in a couple of thickness tiers, ranging from 2.
-
Consider the type of product being packaged, such as dry foods, powders, or beverages, to determine the required barrier degree.
-
Opt for Mylar movie with strong barrier homes to protect in opposition to moisture, oxygen, and UV light.
-
Choose the appropriate thickness; thicker movies offer better sturdiness and protection, but may cost extra.
Cut the Material to the Desired Size
After selecting your movie, the subsequent stage includes cutting the cloth. Begin with the aid of figuring out the size primarily based on the product you plan to p.C.. Use a measuring device, slicing mat, and sharp rotary cutter to ensure accurate traces. It is really helpful to reduce both front and back panels to the same length, maintaining the best alignment. If the cut is uneven, sealing may want to grow to be inconsistent, may also cause air leaks or loss of freshness. Furthermore, in case you're producing several, use a regular template to speed up the procedure. This cautious step sets a solid base for sealing beforehand.
Up and Test the Sealing Machine
Now that your portions are ready, turn your attention to the sealing equipment. A right warmth sealer or impulse sealer is essential for growing robust and long-lasting seals. Set the temperature based on the movie's thickness; thicker substances require higher warmth. Before you begin sealing real, run a test using scrap portions to test bonding power and avoid errors.
Let the device heat up completely earlier than applying stress. Additionally, use protective gloves if the device gets too warm. A proper setup prevents weak seals, brings about leaks or product damage later in storage or transit.
Good packaging is a marketing tool in itself.
Seal the Sides and Keep the Top Open
Once your sealer is ready, its time to create the bag form.
-
Use a heat sealer to seal each side edges of the Mylar bags securely.
-
Press firmly and calmly to create robust, hermetic seals on each aspect.
-
Leave the top side open for filling the pouch with your product.
Insert the Product into the Bag
After sealing three facets, proceed to fill your bag. Use easy equipment and surfaces to keep away from contamination. Dry merchandise consisting of grains, powders, or drugs can be inserted the use of a funnel. However, continually make sure no longer to overfill the bag, as it may make sealing the bag hard or even harm the film. Leave some space on the top to allow for a stable, very last seal. In addition, distribute the product calmly inside the pouch so it doesnt bulge or tilt to 1 side. This instruction step guarantees the bag continues its shape and avoids tearing or leakage troubles later.
Conclusion
Making Mylar bags step by step is a realistic assignment once you already know the full system. From deciding on the proper movie to sealing and testing, each step contributes to a reliable packaging answer. By staying organized and the use of the appropriate gear, you could without difficulty manipulate the technique for each small and large batches. In modern-day production, Printing Packaging allows you to add specific designs immediately at some point of the creation method, saving time at the same time as improving appearance. With care and consistency, your Mylar will meet each personal and industrial wish without useless waste or mistakes. Follow the steps carefully, and youll produce nice packaging whenever.